can you add your own domain to Shopify??
how to create a domain name on Shopify??
How to add your domain name to Shopify??
Are you looking for answers to these queries?? Then you are at the right blog.
I will help you to add your domain to the Shopify store step by step, so follow the steps one by one.
After setting up every detail like product, description, address, currency, payment gateway, etc to your Shopify store, you may need to change the URL of the Shopify store or you would like to add a custom domain to the Shopify store.
A custom domain is your own choice URL which is going to represent your company name/brands. so today we are going to learn
how to add Domain name to Shopify store
Step 1 – For adding a domain name to the Shopify store you need to first verify your domain name, and for verification, you have to add manually A & CNAME records into your domain name provider or DNS records. so open your domain name provider or DNS details to add these values.
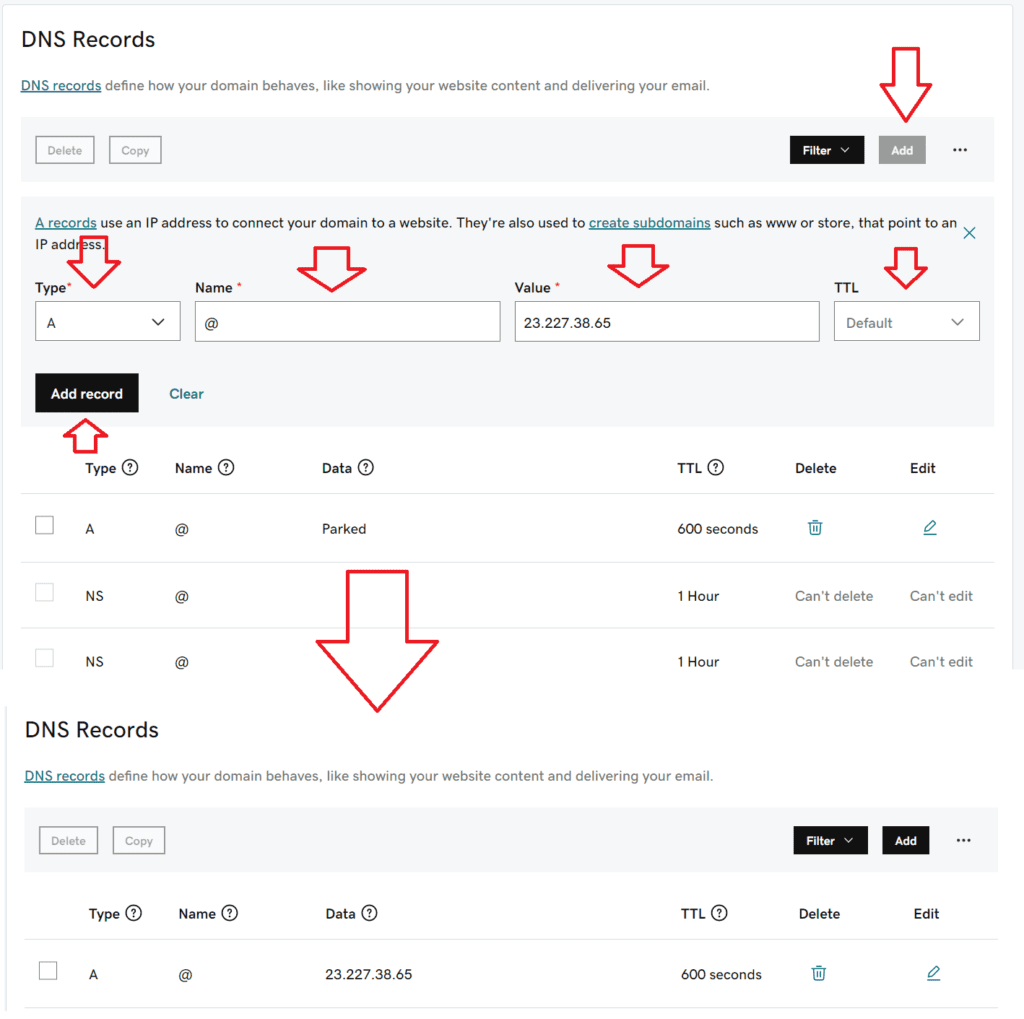
Step 2 – First, you need to add an “A” record, refer to the below image, Click on the “Add” button in the DNS records section and select Type A, enter the “@” in the name box, and enter the IP address “23.227.38.65″ in the “Value” text box and keep TTL as the default and click on “Add Record” button.
you will see A record has been added successfully in the DNS records, it takes 24-72 hours to update in the DNS system, but most of the time it reflects in 5-10 minutes only.
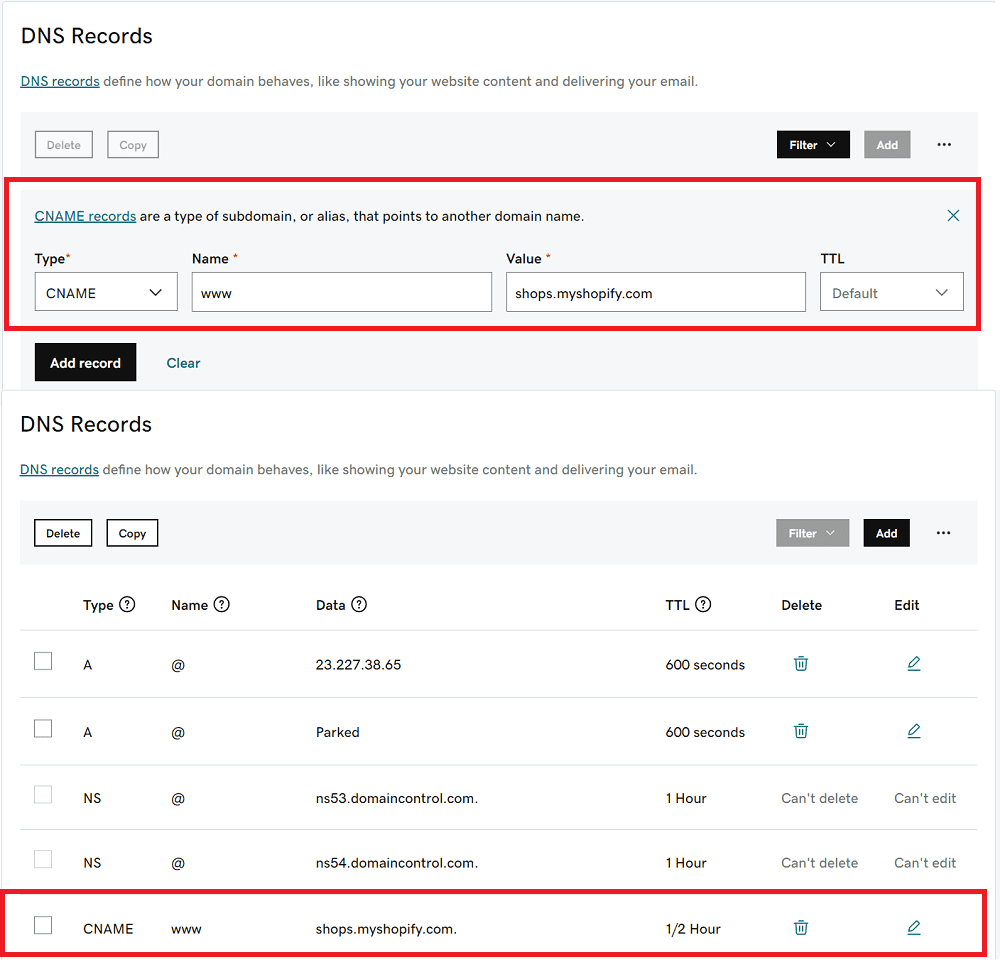
Step 3 – After adding A record, you need to add a “CNAME” record. Click on the Add button, select the Type “CNAME”, enter “www” in the Name text box, and enter the “shops.myshopify.com” in the value text box and keep TTL as default and click on “Add Record” button (Refer to the below image for reference).
Note: you can add only one CNAME record using the name “www”. so if you have already added it, please remove it and then add the Shopify CNAME record.
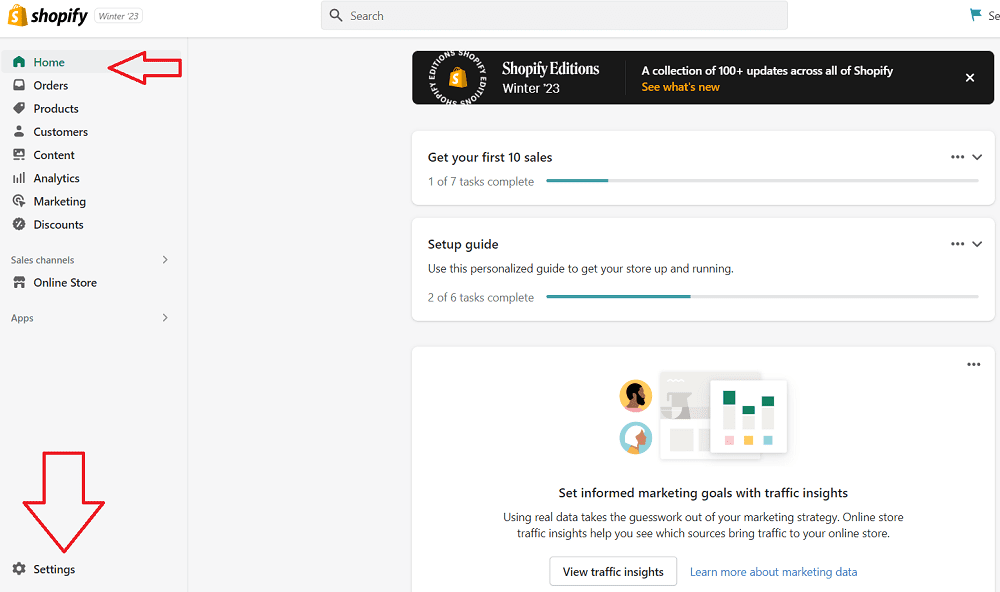
Step 4 – Now, log in to your Shopify store admin panel and click on the settings (you will see this option at the left bottom corner).
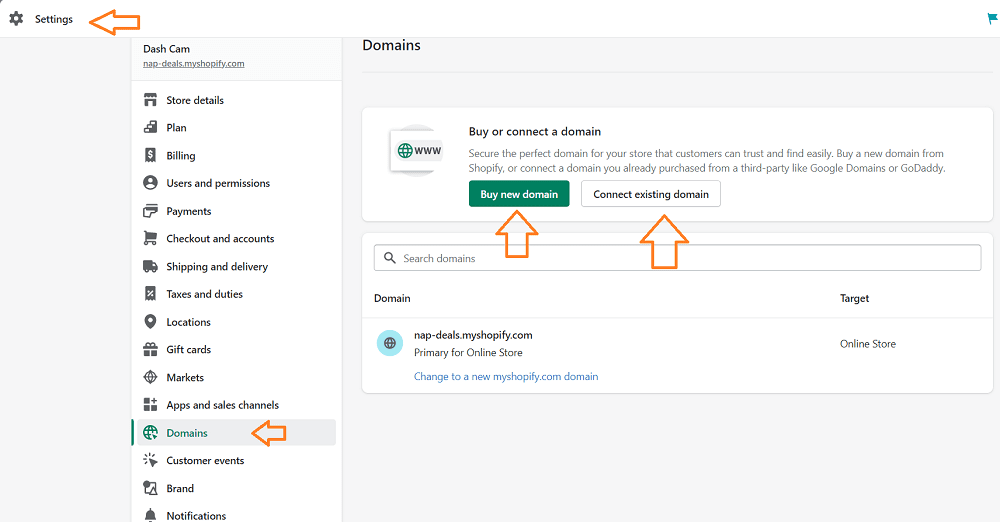
Step 5 – After clicking on the settings option, a new popup window will appear, where you will see the “Domain” link on the left-hand side (Refer to the below image). After that, you need to click on “Connect existing domain“.
Step 6 – After clicking on the “Connect Existing Domain” add your custom domain in the domain box and click on the “Next” button (Refer to the below image).
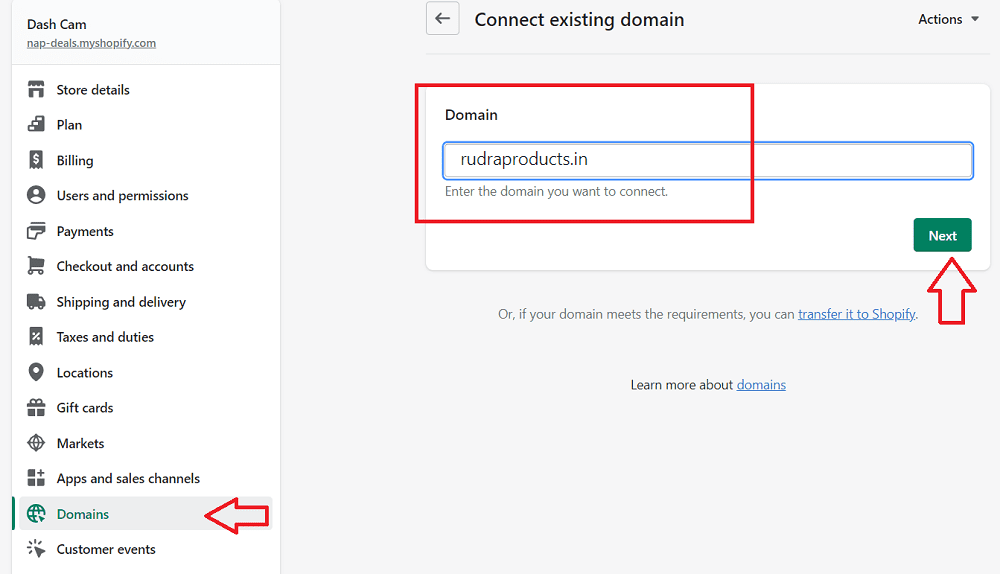
Step 7 – After adding your own domain name into the box and clicking on the “Next” button you will see a domain verification window, now click on the “Verify Connection” button (refer to the below image for more details).
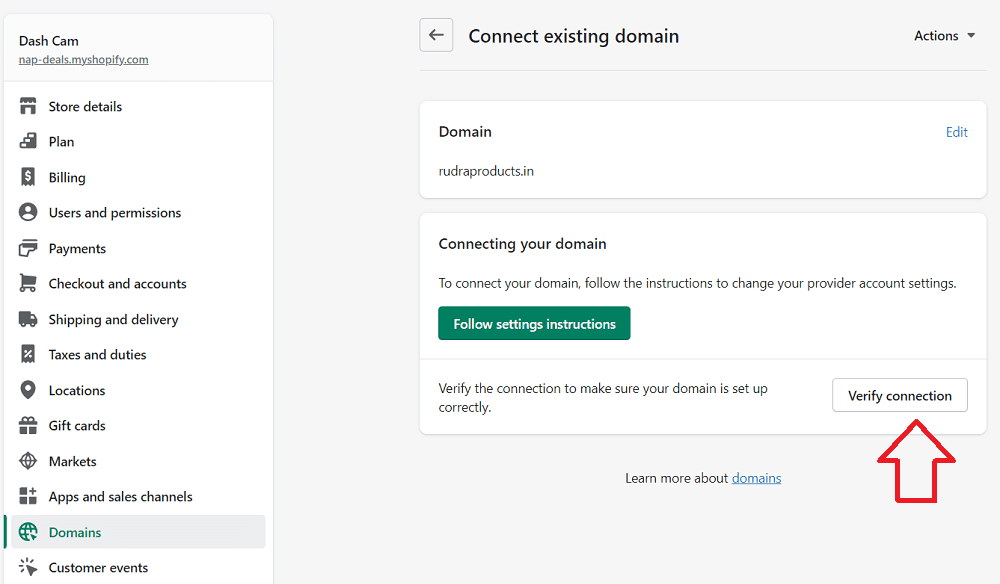
Step 8 – After clicking on the “Verify Connection” button you will see the domain verified and displayed in the domains (Refer to the below image).
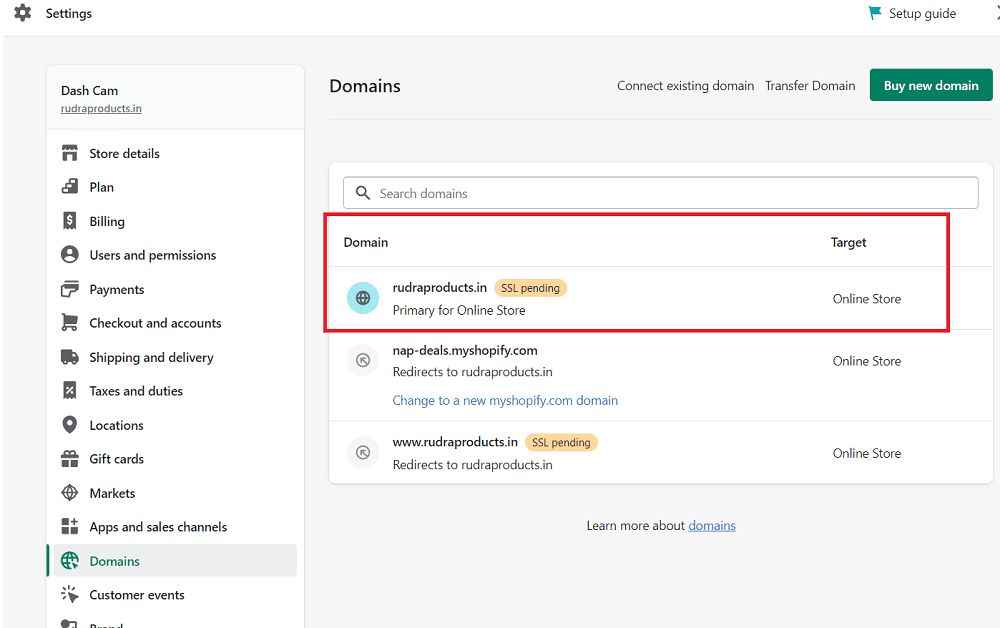
domain added to the Shopify store
so we have learned How to add domain name to Shopify store successfully.
